Showing posts with label desserts. Show all posts

Sunday, 24 November 2024

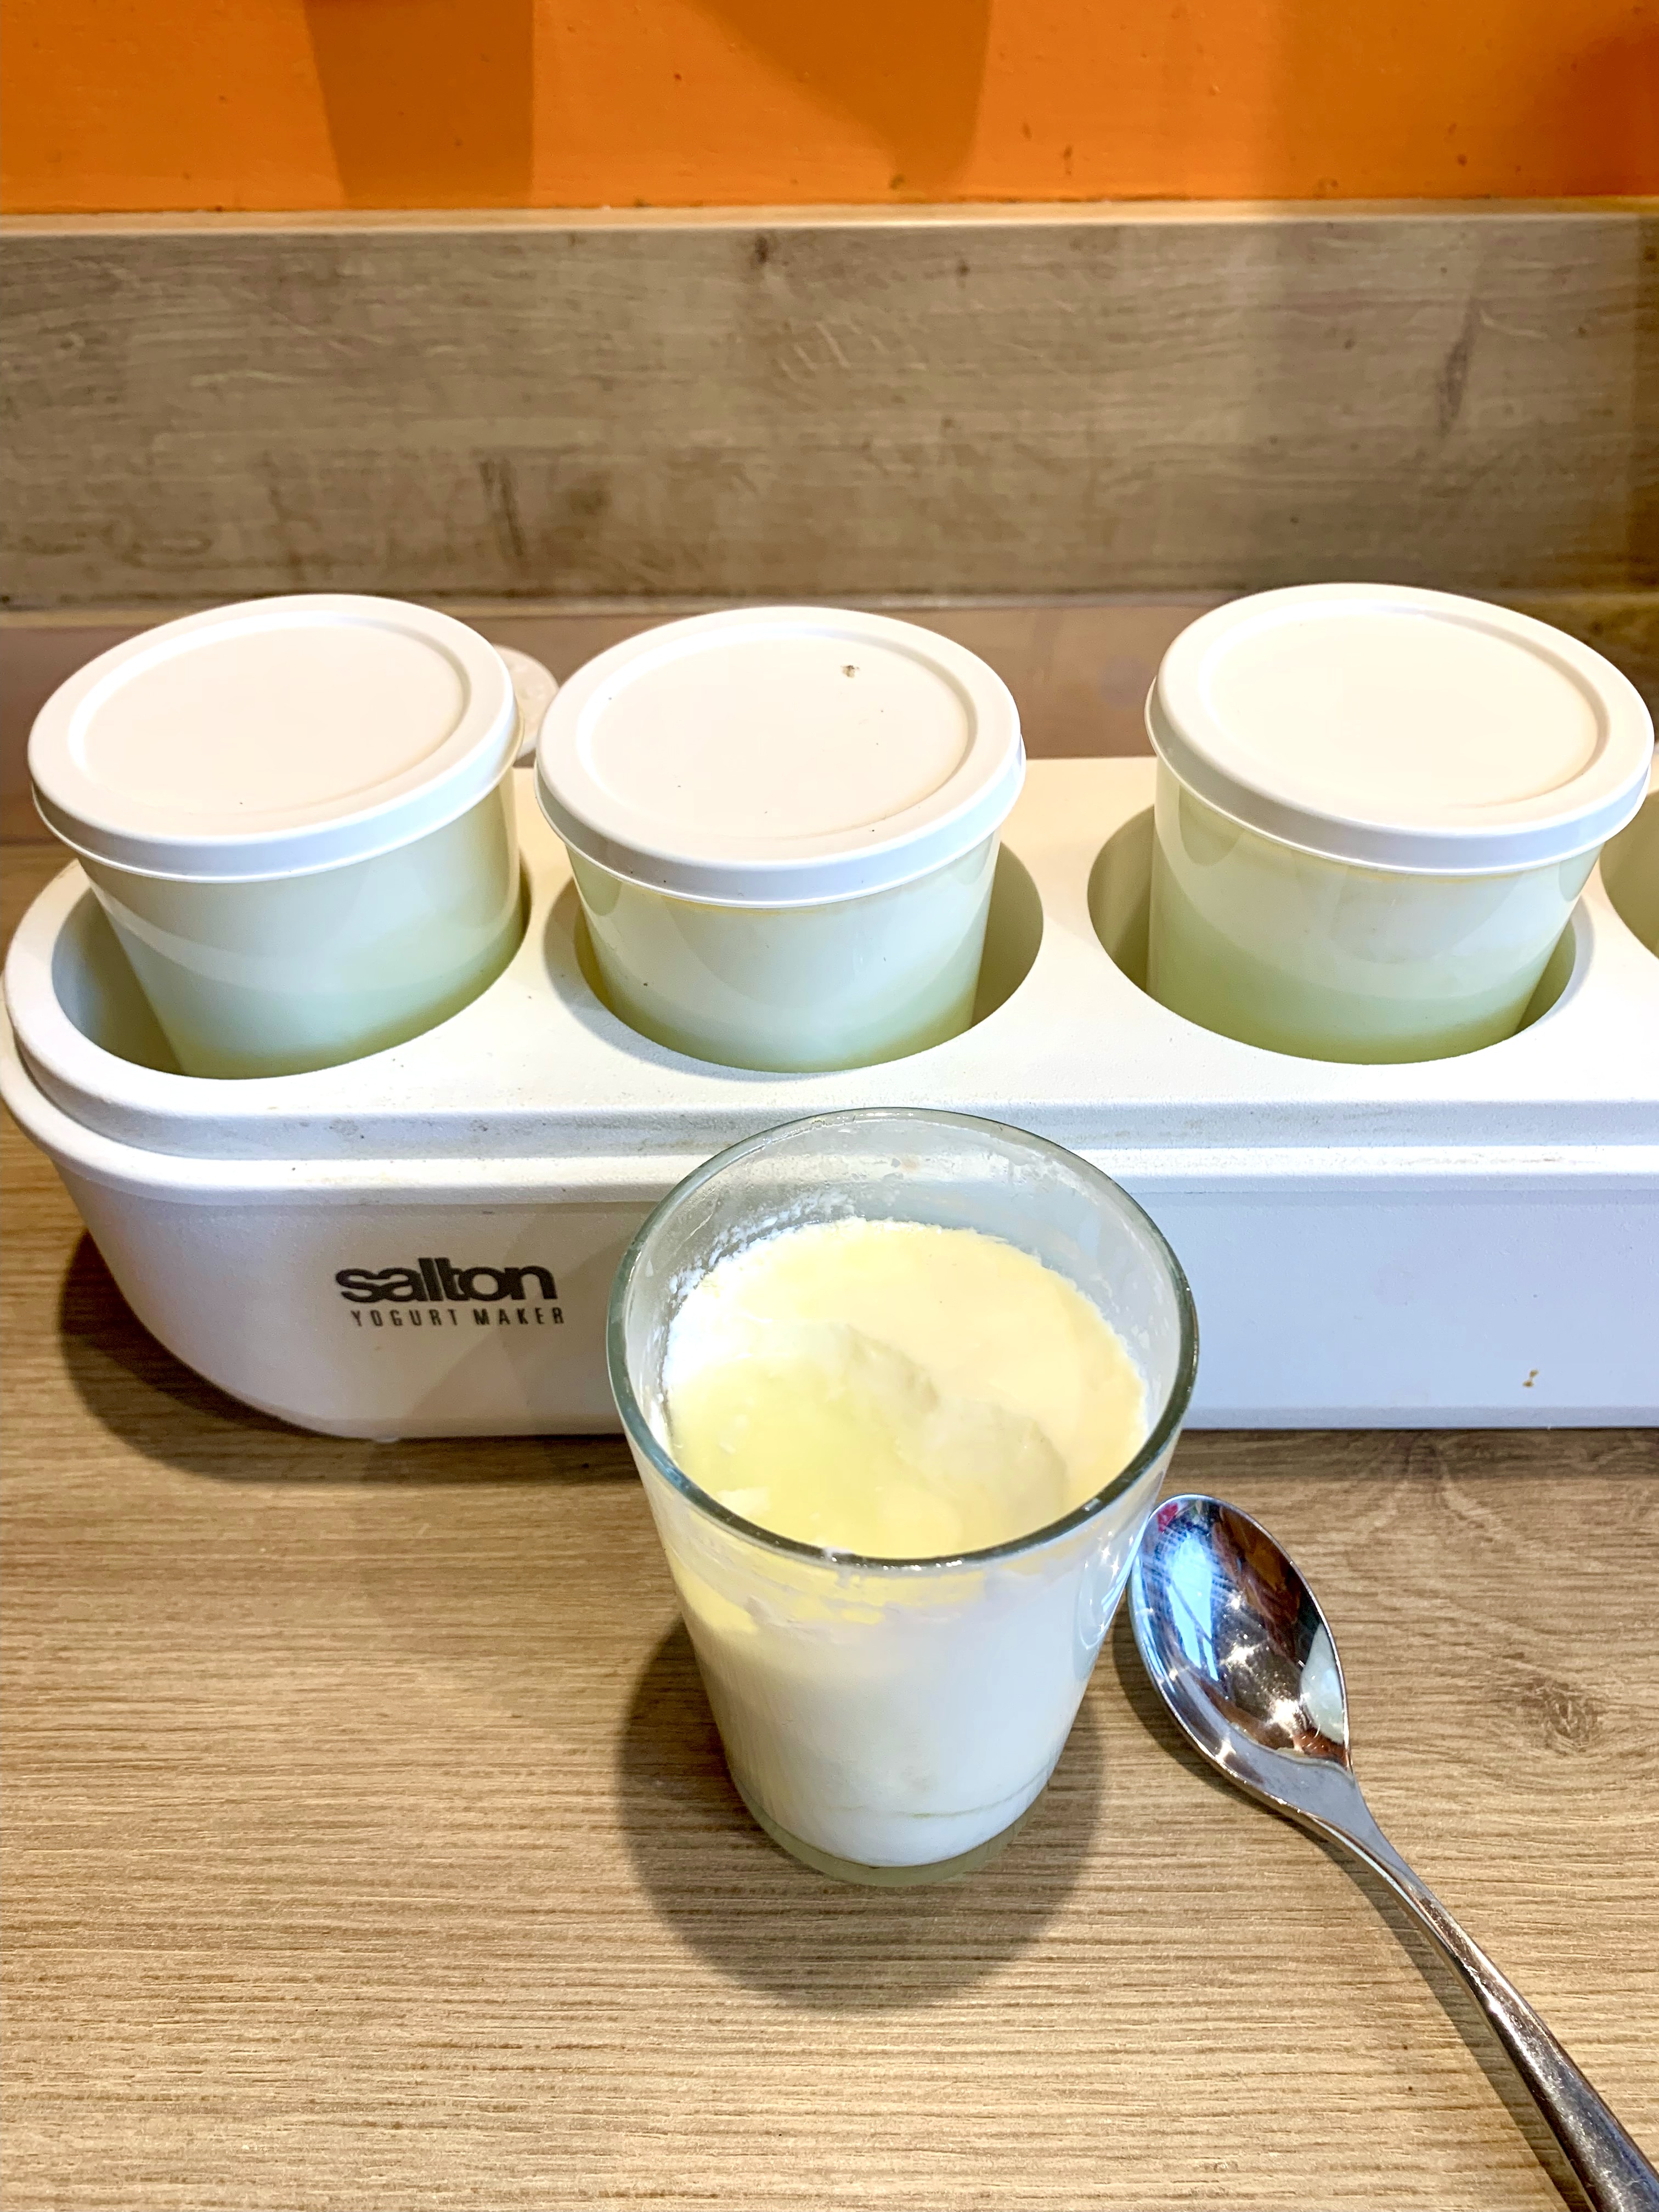
Homemade Yoghurt


Yoghurt is a fermented food, which are great for gut health and long term health. I'm trying to eat more fermented foods, so thought I'd hunt out my old charity shop yoghurt maker and make some homemade yoghurt which is full of 'good' bacteria. 

Presuming you don't have a yoghurt maker it can be made in a vacuum flask, or insta pot with a yoghurt setting. Slow cookers don't work as they are too hot even on their lowest setting. Trust me, I tried and it didn't work!

10 minutes cooking time, 30 minutes cooling, 10-24 hours fermenting/setting

500ml organic whole milk (If using a yoghurt maker, measure milk by pouring into the container(s). Mine has 5 small glasses taking just under 1 litre of milk)
1 heaped tbsp organic greek yoghurt, or leftover homemade yoghurt

Heat the milk in a small non-stick saucepan over a medium heat, stirring now and then to ensure it doesn’t catch on the bottom of the pan, until it reaches 85°C on a thermometer (I used a meat probe). It should be steaming slightly but not boiling, and small bubbles starting to appear.

Turn off the heat, cover with a lid and leave to cool to 46°C, which takes about 30 minutes.  Stir regularly to prevent a skin from forming.

Mix the yoghurt in a small bowl or yoghurt maker glass with about 3 tbsp of warm milk, then pour back into the pan and whisk well to combine.

Pour into a 500ml flask warmed with mug of boiling water, or yoghurt maker, fasten the lid and leave undisturbed at room temperature or better still and airing cupboard for at least 10 hours.  It can be left for  up to 24 hrs for a thicker texture and stronger flavour. 

If you like it thicker still, it can be strained through a muslin, to make Greek yoghurt. Line a sieve or colander with cheesecloth (or strong paper towels) and place over a large bowl. Pour yogurt into the sieve and place in the fridge. Check every few hours until yogurt reaches your desired thickness.  The liquid that is drained out of the yogurt is whey. This is a great protein and works well in smoothies and soups.

When the yoghurt is set, transfer to a clean container and seal. It will keep in the fridge for up to 2 weeks.

I stir 1 tbsp chia seeds, 1 tbsp flax seeds, 1 tbsp mixed seeds, 1 tbsp porridge oats, and a small handful of berries into a small pot of homemade yoghurt for a filling breakfast, stir in fruit compote to made fruit yoghurt, add to curries, make raita with it, and so on.

Instagram: leesashomemade
Facebook: Leesa's Homemade

Tuesday, 14 June 2022

Swedish Cardamon Buns


Just like Cinnamon Buns, but with ground cardamon. Surprisingly easy, even the plaiting.

I've taken the Richard Bertinet's Cinnamon Bun recipe I first used a couple of months ago, and halved the quantity so it made 12.

Makes 12 buns

For The Dough;
100g Full Fat Milk
1 Medium Eggs
300g Strong White Bread Flour
6g dried quick yeast
25g Caster Sugars
100g Salted Butter (at room temperature)

For The Filling;
75g Salted Butter (at room temperature)
125g Soft Brown Sugar
1 tsp ground cardamon or crushed seeds from 35 cardamon pods

For The Egg Glaze;
1 Egg

Start by making the dough. Put the milk and eggs into the bowl of a food mixer (I used a bread machine on dough cycle instead), add the flour, then the yeast to one side of the bowl, and the salt and sugar and butter to the other side of the bowl

Mix on a slow speed for 4 minutes then increase the speed to medium and mix for a further 10-12 minutes until the dough comes away cleanly from the side of the bowl. Or just leave the dough cycle on your bread machine to run. Mine is 45 minutes long, including proving time.

If using a food mixer, form the dough into a ball and pop into a clean floured bowl. Cover and leave for around 45 minutes or until doubled in size.

For the filling, beat the butter and sugar together until pale and stir in the cardamon. Spread the filling over the top of the dough (if softening the butter in the microwave, take care not to let it melt too much - mine was a little sloppy to work with and oozed out of my rolls when twisting).

Roll out the pastry to a rectangle roughly 35 x 45cm, with the longer edge facing you. Spread the cardamom butter over the surface, right to the edges. Fold the top third down to the middle and the bottom third up, like an envelope, so you have three layers of dough. Score, then cut into 12 equal strips, measuring about 3.5 x 11cm each. 

If you're able to plait, make 3 cuts down strips leaving 1 cm uncut at the top. Take each plait and roll it up along its length starting from the cut end then place, uncut end down, in a greased 12 cup muffin tray. I used silicone muffin cases to save greasing. If you can't plait, cut each strip into 2 and twist instead of plait. Cover and allow to prove for 1 hour.

Preheat the oven to 200°C. Brush the knots with the egg glaze and sprinkle with a little brown sugar. Bake for 15-20 minutes until golden.

Instagram: leesashomemade
Facebook: Leesa's Homemade
Twitter: leesashomemade


Sunday, 19 April 2020

Homemade Chocolate Crunchie Bars


Moaning at my children that there is nothing useful on TikTok, my daughter told me there was a Crunchie Bar recipe on it she would like to try.  Unhelpfully, the video had no ingredients/quantities.  But a short lesson in googling later we found a straightforward recipe.

Getting the molten sugar is the tricky part.  The recipe I followed called for a jam thermometer, which luckily I had. But I don't know if it wasn't working properly (it is a mercury thermometer and  at least 50 years old), and I thought the resulting honeycomb caramel tasted a bit bitter/burnt. But apparently, what do I know.

Makes approximately 12 small bars

175g granulated sugar
125g golden syrup
1½ level tsp bicarbonate of soda (NOT baking powder)
150g good quality milk chocolate (the cheap stuff doesn't melt properly)

Line a small baking tray with greaseproof paper.

Dissolve the sugar and golden syrup in a pan with 2 tbsp of water over a low heat.  Heat until the sugar has reached the crack stage (156°C or 300°F on a sugar thermometer). If you don’t have a thermometer, drop a little into a cup of cold water; it should become hard at once.

When hot enough, quickly stir in the  bicarbonate of soda. It will instantly foam up immediately but make sure all the soda crystals have dissolved. Pour onto a greased baking tray and tip to distribute evenly rather than spread it with a utensil as this deflates the foaming sugar.

Before it gets too hard, score the honeycomb with an oiled knife to make it easier to break into bars when hard.

Whilst the honeycomb is hardening, break the chocolate into squares and melt in the microwave in 10 second bursts. Once most is melted stir well with a spatula as the small lumps will continue to melt with the heat of the chocolate. When smooth and silky, pour over the honeycomb and use a spatula to help cover everything. Chill in the fridge to help harden then break into bars.

Twitter: leesashomemade
Instagram: leesashomemade
Facebook: Leesa's Homemade

Monday, 21 October 2019

Pistachio & Honey Ice Cream


A Middle Eastern inspired pudding to finish our vegetarian gluten free meals with friends last weekend.

300ml double cream
50g finely crushed shelled pistachio nuts
4 tbsp runny honey
2 tbsp granulated sugar

Mix all ingredients in an ice cream maker.  If you have the time freeze after making, but this is very nice as a mousse like consistency if you don't have time.
Instagram: leesashomemade
Facebook: Leesa's Homemade

Friday, 23 August 2019

Blackberry Ice Cream


A friend on Instagram gave me her recipe for Blackcurrant Ice Cream a few years ago, and included a version with blackberries.  Last night I made my first Blackberry Ice Cream with the big fat cultivated blackberries from my allotment, but it would be just as good if not better with wild blackberries.

400g blackberries
100-200g sugar
300ml double cream

Mix the sugar and fruit together in a saucepan and heat gently, stirring from time to time, until the sugary fruit juices begin to bubble.  I used 200g sugar last night, which is very much to my kids sweet tooth but less so to mine.  I would probably use less next time.  Turn off the heat and leave to cool.

Pass the cooled stewed fruit though a sieve and stir in the double cream.  Leave to chill in the fridge.  Once cold put in an ice cream maker.  If you haven't got an ice cream maker, put in an old ice cream tub and freeze for 4-6 hours, stirring every hour. to stop it freezing as a solid block!

Works well with all soft fruit; strawberries, raspberries, blackcurrants, gooseberries...

Instagram: leesashomemade
Facebook: Leesa's Homemade

Monday, 25 September 2017

Toffee Apple Cake


Oops. I posted this last year but when I came to look up the recipe for this year's apple harvest I realised I hadn't posted any text at all.  Thankfully I remembered where I got the recipe from, The Daily Mail's Upside Down Apple Cake.

Serves 8

For the caramel
175g (6oz) caster sugar
125ml (4fl oz) water
3 small red-skinned apples (such as Cox’s)
A squeeze of lemon juice

For the cake
175g (6oz) butter
175g (6oz) caster sugar
3 eggs, beaten
150g (5½oz) self-raising flour
1tsp baking powder
2tbsp ground almonds

Cream, to serve (optional)

Butter a 24cm (9½in) round springform cake tin and line the base with parchment paper. For the caramel, melt the sugar and water in a small pan over a low heat. Bring to the boil and bubble over a low heat for a few minutes until a deep golden colour – be careful not to burn it. Quickly remove from the heat and pour it immediately into the base of the cake tin. Core and slice the apples and place in a bowl. Add the lemon juice and toss, then arrange in concentric circles in the base of the tin (see finished cake, above).

Preheat the oven to 190°C/fan 170°C/gas 5. In a bowl cream together the butter and sugar until pale and light. Gradually add the eggs, then sift in the flour and baking powder. Mix together then fold in the ground almonds. Pour the cake mixture over the apples in the tin and spread evenly. Bake for 40-45 minutes until deep golden and springy to the touch and the edges are just coming away from the tin. Allow to cool for just a few minutes on a wire rack, then turn upside down onto a serving plate. (If you leave it any longer the apples will stick to the lining paper.) Serve with cream, if liked.

Twitter: leesashomemade
Instagram: leesashomemade
Facebook: Leesa's Homemade

Tuesday, 20 October 2015

Rose Hip & Apple Jelly

I tried making rose hip syrup a few years ago and found it pretty 'woody' tasting, but an enticing photo on a Facebook post from BBC Good Food for Rose Hip & Apple Jelly together with a bumper rose hip harvest had me trying this. 

Unlike last time, the smell of the rose hips stewing on their own was fruity and appetising.  The taste too of the final product makes me realise I probably was dosed on rose hip syrup as a child in the 1970s.

500g rose hips
500g apples (crab, eating, cooking)
1 small lemon
About 500g sugar
Small knob of butter

Wash then simmer your rosehips in 1 pint of water for 40 minutes with the lid on until soft.  Leave to cool and then mash as best you can or chop in a food processor.

Roughly chop the apples.  There is no need to peel or core as you will be straining the cooked fruit through a jelly bag.  I simply added mine to the food processor with the rosehips.

Add 1 more pint of water to the pan together with the chopped rosehips and apple and bring to the boil with wide strips of lemon peel.  Simmer for about 15 minutes until the apple is soft.

Strain through a jelly bag overnight.  The strained liquid will look worryingly cloudy, and more like cream of prawn soup.  Don't worry! This clears once the sugar is added. 

Measure out the strained juice, adding 400g of sugar to every 500ml of liquid.  Bring to the boil gently to dissolve the sugar then turn up the heat and boil rapidly for 10 minutes.  Check to see if the jam has reached setting point by placing a teaspoonworth on a saucer that's been in the freezer.  If still runny after cooling for a minute or so, boil the jelly for another 10 minutes then check again.  I took mine off the heat too soon because I was in a hurry and ended up with a quite lovely rosehip syrup like maple syrup! So based on this experience, it could take 20 minutes plus to reach setting point!

Take off the heat and stir in a small knob of butter to clarify the jelly.  Pour into sterilised jars and seal with lids that have been boiled to sterilise.

If you do end up with a syrup like I did, just use it with pancakes, porridge, ice cream etc.


Friday, 27 June 2014

No Bake Dinosaur Cake

I can't say I wasn't given fair warning that Big Boy wanted a dinosaur cake for his 6th birthday - I think he told me the day of his 5th birthday.  But I didn't start to think about how to make one until 2 days before, which left it too late to get the dinosaur cake mould my sister-in-law in South London offered me.

So instead I googled dinosaur cake and discovered I could adopt a similar principle to my No Bake Train Cake, that is to say buy a cake in the supermarket and 'assemble' a dinosaur.

Ingredients
2 circular cakes, I used Victoria Sponges from the Co-op
1/2 jar of seedless jam
250g icing sugar
Green food dye
Chocolate buttons
Suitable size cake board or tray

1.  Cut one of the cakes into a head and a tail.  I looked at some templates online, and ended up tracing a Ying & Yang shape in the sugar of one of the cakes.  I then held what I decided was the 'head' piece of cut cake over the whole cake and trimmed off any excess from the neck with a sharp knife so it would fit right up against the round 'tummy' cake.  Use some of the offcuts to fill any gaps between the head and the body.

2.  With the point end of the other cut 'tail' piece of cake I again held this over the tummy and trimmed any excess off so the tail would fit right up against the body with some of the offcuts.

3. Cut 'legs' out of the cake off cuts.

4.  Warm half a jar of seedless jam in the microwave until bubbling.  One by one, dip the end of head, tail, and legs that join the body into the jam and use it as glue to hold these pieces in place.  Then drizzle the rest of the jam over the cake so it coats the top and sides, particularly any cut edges of cake as they are very crumbly!  This jam helps the icing stick to the cake and also stops the cake crumbling too much.

5.  Make the fondant icing by mixing the icing sugar with the green food dye and 2-3 tsp water.  Add the water one teaspoon at a time and mix until stiff.  Knead for 3 minutes then roll out to the size of your cake.  I misread the recipe and added 2 tbsp of water and ended up with a gloopy green mixture which I had to apply like sticky polyfilla to my cake.  Drape the icing over the cake and gently encourage it to droop down the sides.  Cut any excess from where the icing folds ie where the legs join the body.

6.  Decorate with chocolate buttons stuck on with jam.  With a sharp knife, fashion some teeth and claws from another chocolate button.

Thursday, 8 May 2014

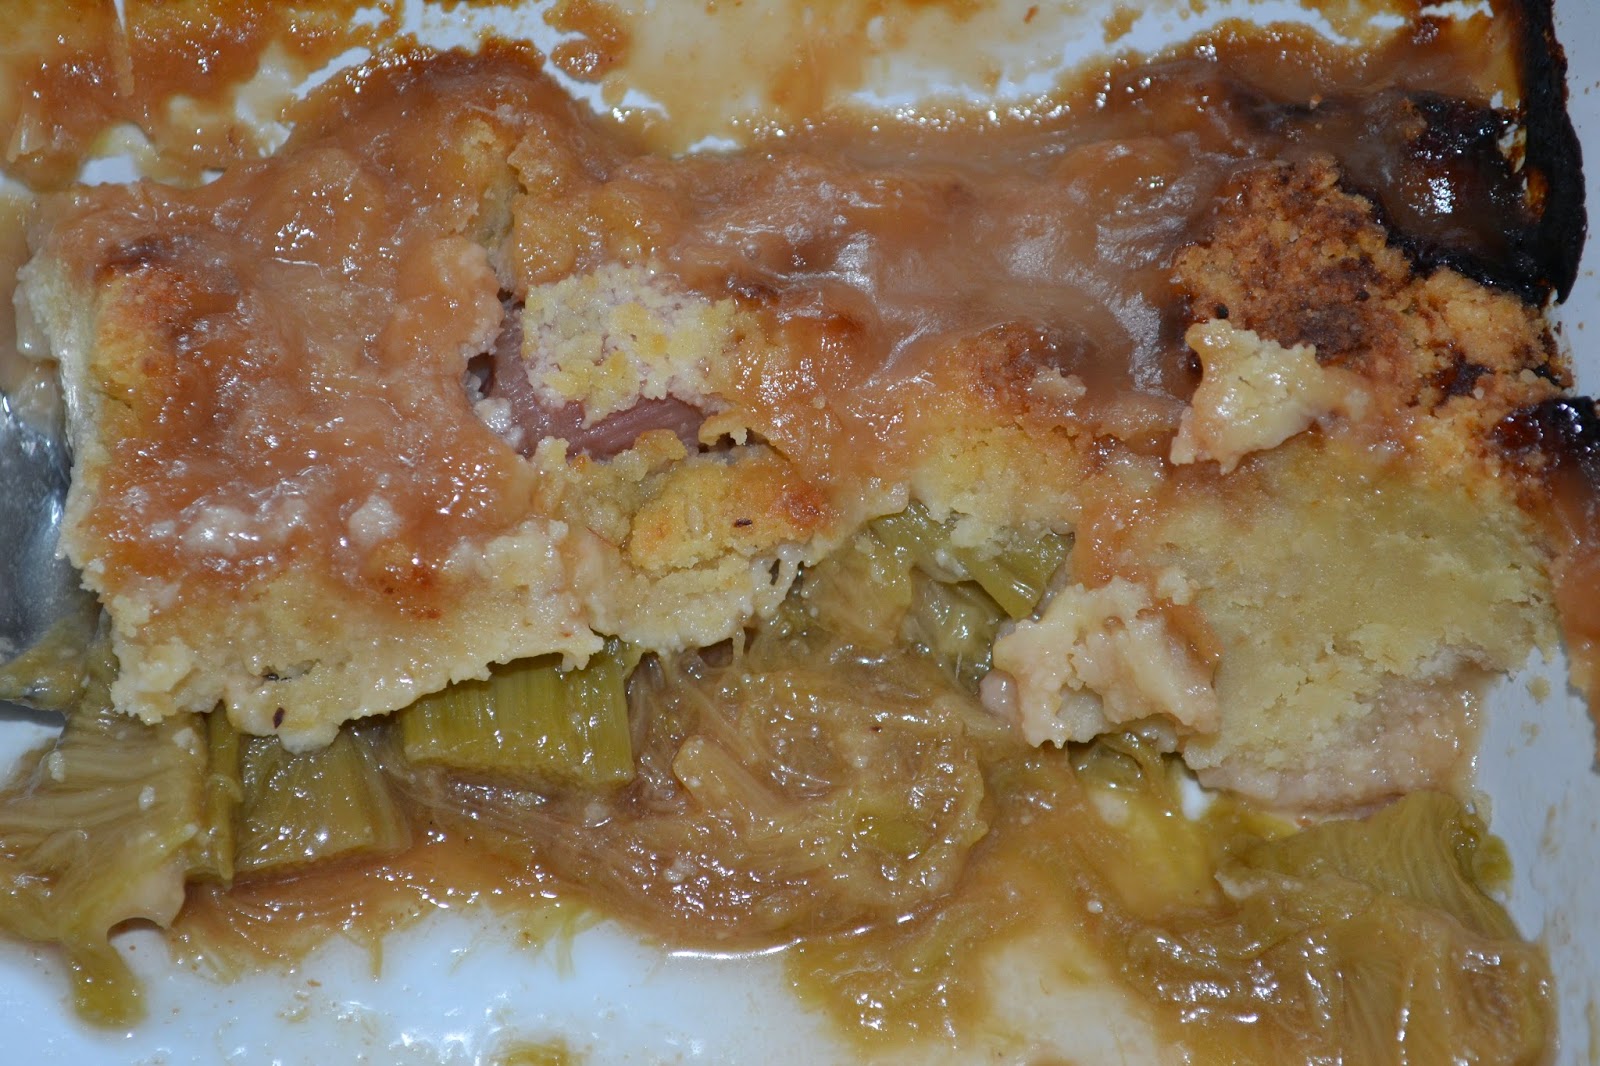
My Best Ever Rhubarb Crumble

Ever since we moved to this house 10 years ago and inherited a large rhubarb patch I have tried unsuccessfully to make rhubarb crumble.  I don't know why something so simple seems so hard, but I have fed my aunt raw rhubarb during my Gran's wake and usually have something akin to a dry dusty desert of a topping.  That is all up until now.

My luck turned on discovering Jamie Oliver's Rhubarb & Sticky Stem Ginger Crumble recipe, plus stumbling across  Felicity Cloake's article 'How to make perfect crumble' on The Guardian's website.  The two essential tricks to me are 1) stew hard fruit like my sturdy unforced rhubard for about 5 minutes beforehand to give it a head start at softening, and 2) add oats and a few sprinkles of water to the crumble mix to make it, well, crumbly.

Serves 4-6 heartily

Stewed Rhubarb
1kg rhubarb, washed and cut into largish chunks
100g sugar
Zest & juice of 1 orange

Other possibilities; 1 tsp fresh grated or ground ginger instead of orange zest, apple juice instead of orange, honey instead of sugar. Jamie Oliver used stem ginger in his recipe but I never have any in.

Crumble Topping
100g plain flour
100g cold butter
100g sugar
100g oats

Preheat oven to 180C.  Put all the stewed rhubarb ingredients into a pan and bring to the boil with the lid on.  Simmer for a couple of minutes with the lid on, and then a couple with the lid off.  Spoon into an ovenproof baking dish and put to one side whilst you prepare the topping.

I always make topping in a food processor now.  Put the cubed cold butter and flour in the food processor and pulse until it resembles largish breadcrumbs.  Stir in the sugar and oats until mixed well.  Sprinkle with a little water and stir gently so the crumble clumps together a little.  Sprinkle evenly over the stewed rhubarb but do not press down!

Bake for 30-40 minutes, or until the crumble is golden and bubbling.  Serve with custard, creme fraiche, or cream.


Monday, 17 March 2014

Quick Failsafe Chocolate Brownies

Several years ago I printed out a chocolate brownie recipe that worked a treat.  Only problem was that I lost the print-out.  I tried other recipes, including some from tv chefs, but none were as good as my 'original' recipe.

To my complete delight I found the recipe about 6 months ago, and after making these twice over the weekend for my birthday Princess and assembled family members, I must now post the recipe on my blog so as never to lose it again.

Makes approximately 12 slices

100g dark chocolate
110g butter
100g sugar
100g chopped walnuts or white chocolate drops (I used white choc above)
2 large eggs
50g plain flour
1/2 tsp baking powder

Preheat oven 180°C.

Line a small high sided flapjack/baking tray with greaseproof paper. 

Snap the dark chocolate into squares into a small microwave proof bowl. Add the butter and microwave for 30 seconds on high.  Stir, then microwave again for up to 30 seconds to melt the chocolate and butter.  Leave to one side.

In a larger mixing bowl, weigh out the flour, sugar, and baking powder.  Whisk with a fork then add the chopped nuts or white chocolate.

Beat the eggs thoroughly into the chocolate and butter mixture then pour this into the larger mixing bowl with the dry ingredients.  Stir in well with a spatula then scrape out into the baking tray.  Spread the mixture into the corners with the spatula.

Bake in the oven for 10 minutes.  Turn the tray round then bake for another 10 minutes.  Take out of the oven to cool.  You can flip this out to cool by placing a clean chopping board on top of your baking tray with the hot brownies in, then carefully flipping this over.  Peel off the greaseproof paper, then put the wire cooling rack top of the upside down brownies on the chopping board and flip this back over to get your brownies back up the right way on the cooling tray.  DO NOT try to pick the brownies out of the baking tray by picking up the greaseproof paper.  I learnt to my cost that you that the brownie just crumbles into the middle!

10 minutes cooling should be enough so as not to scald the mouths of small children.


Thursday, 19 December 2013

Unbelievably Easy Mince Pies


Great pastry recipe from the BBC's Good Food website.  As it says in the blurb, you can throw the dough around and the mince pies still come out crisp and biscuit.  This recipe's a keeper.  I used homemade mincemeat made about 6 weeks ago from Delia Smith's recipe.

I made it in the food processor.  Pulse it until the mixture resembles breadcrumbs, adding 1tsp of water at a time until it starts to come together.  You can tip it out on the worktop when it is at the breadcrumb stage, but I find it just goes everywhere.

It says it makes 18, taking a walnut sized piece of dough and squishing it into holes in the tin.  I rolled the pastry out to the thickness of a £1 coin, and put a star on top instead of a full 'lid' and made 34 of these yesterday for the Alresford Country Market.  They all sold so now I'm starting again!


Ingredients
225g cold butter, diced
350g plain flour
100g golden caster sugar
280g mincemeat
1 small egg
icing sugar, to dust
To make the pastry, rub 225g cold, diced butter into 350g plain flour, then mix in 100g golden caster sugar and a pinch of salt. Combine the pastry into a ball – don’t add liquid – and knead it briefly. The dough will be fairly firm, like shortbread dough. You can use the dough immediately, or chill for later.
Preheat the oven to 200C/gas 6/fan 180C. Line 18 holes of two 12-hole patty tins, by pressing small walnut-sized balls of pastry into each hole. Spoon 280g mincemeat into the pies.
Take slightly smaller balls of pastry than before and pat them out between your hands to make round lids, big enough to cover the pies. Top the pies with their lids, pressing the edges gently together to seal – you don’t need to seal them with milk or egg as they will stick on their own. (The pies may now be frozen for up to 1 month).
Beat 1 small egg and brush the tops of the pies. Bake for 20 minutes until golden. Leave to cool in the tin for 5 minutes, then remove to a wire rack. To serve, lightly dust with icing sugar. They will keep for 3 to 4 days in an airtight container.
Recipe from Good Food magazine, December 2002

Monday, 30 September 2013

Chocolate & Beetroot Chocolate Brownie Hello Kitty Birthday Cake

As a change from the now almost habitual Chocolate Train Cake, 8 years old today Sprout requested a cake from a few years ago - a Hello Kitty Chocolate Cake.

I made two of these before and can't remember which chocolate cake recipe I used, so I decided to make River Cottage's Chocolate & Beetroot Brownie recipe with some lovely homegrown beetroot from the Alresford Country Market and hide it in a cake.

Despite me thinking my round cake tin was a similar size to the shallow brownie tin specified in the recipe this cake rose quite spectacularly.  Better than anything I have made before (my bread always rises beautifully - my cakes don't), but took a lot longer to cook than the 20-25 minutes for the brownies.  After 40 minutes I was concerned that the outside was burning despite the inside coating a skewer like nutella.

But I need not have worried.  We have just had nearly half the cake as a birthday tea (with a main of Pesto Pasta as requested by the birthday girl) and it was beautifully moist, not burnt, and dare I say it possibly could have done with 5 minutes less cooking time.

The Hello Kitty face was made by cutting out a face from a colouring print out, placing it like a stencil on top of the cooled cake and dusting with with icing sugar through a sieve.  I cut out the eyes and nose from the sheet and used them as a stencil but have used Smarties before.


River Cottage Every Day's Chocolate & Beetroot Brownie Recipe
Prep Time: 20 - 25 minutes
Cook Time: 20 - 25 minutes
Servings: Makes about 20

Ingredients
250g unsalted butter, cut into cubes

250g dark chocolate (about 70% cocoa solids), broken into pieces
3 medium eggs
250g caster sugar
A pinch of sea salt
150g self-raising flour (wholemeal ideally but white works well too)
250g beetroot, boiled until tender, cooled, peeled and grated


Directions
Grease a shallow baking tin, approximately 20 x 25cm, and line the base with baking parchment.

Put the butter and chocolate in a heatproof bowl. Set the oven at 180°C/Gas Mark 4 and put the bowl in it for a few minutes until the chocolate and butter start to melt. Stir, then put back in to the oven for a few more minutes to melt completely. Of course, you could melt them together in the traditional way, over a pan of hot water, but it is a shame not to exploit the warming oven.

Whisk the eggs and sugar together in a large bowl until combined then beat in the melted chocolate and butter until smooth. Combine the salt with the flour, sift them over the chocolate mixture, then gently fold in with a large metal spoon. Fold in the grated beetroot – be careful not to over-mix or it will make the brownies tough.

Pour the mixture into the prepared tin and smooth the top with a spatula. Bake for 20 – 25 minutes; when the brownies are done, a knife or skewer inserted in the centre should come out with a few moist crumbs clinging to it. Don’t be tempted to overcook them or they will be dry. Remove the tin from the oven and leave on a wire rack to cool before cutting in to squares. 

Sunday, 29 September 2013

River Cottage Everday Apple & Almond Pudding Cake


I leafed through Riverford's Everyday Cookbook yesterday looking for a recipe for chocolate and beetroot cake only to find it was a brownie recipe.  But the Apple & Almond Pudding Cake looked the perfect thing to take to my mother-in-laws for an impromptu family gathering and possibly celebrate Sprout's birthday a day early.  Her chocolate & beetroot cake can wait until tomorrow.

At the time of writing it is uneaten but looks and smells delicious.  Although possibly I should have sprinkled it with a little extra brown sugar and cinnamon before baking?

Sunday Evening Update
Apple cake wolfed down by all apart from one out of two fussy nieces.  Birthday girl moaned that there wasn't enough for seconds.

Twitter: leesashomemade
Instagram: leesashomemade
Facebook: Leesa's Homemade

Tuesday, 25 June 2013

No Bake Caterpillar Cake


My Big Boy was 5 on Wednesday and we held his (all girl) party at the weekend.

This year I managed to talk him out of the seemingly traditional No Bake Chocolate Train Cake I have done for his last two birthdays, as well as his sister's last birthday.  Instead I thought I'd try a Caterpillar Cake.  Same idea, more colour!

2 chocolate swiss rolls
1 pack unsalted soft butter
400g icing sugar
1 tsp green food colouring
2 strawberry or licorice straws
1 tube of smarties or M&Ms
12 large chocolate buttons

I start by making the icing.  Mash the icing sugar and butter together in a mixing bowl.  Stir in the food colouring.

To make a small hump, slice one of the swiss rolls in half.  Cut a small slice off each end at an angle so each half can be lent together in an upside down V shape.  Cut the remaining swiss roll in half and push these up against each end of the V to hold it in place.  You can trim away a little swiss roll from the end to close any big gaps in the join, but don't worry too much about gaps as these will be covered with the butter icing.

 If you don't want to make a hump, just stick the two swiss rolls together end to end without any cutting.

Cover the 'caterpillar' in the butter icing.  I just used a desertspoon to do this rather than any fancy equipment.  Scatter with Smarties, stick in the feelers, make a face, and poke the large chocolate buttons under the side on both sides at regular intervals to make feet. Done.

Thursday, 20 June 2013

Birthday Boy Brownies


My Big Boy was 5 yesterday.

We are having his party on Sunday and he has put in a request for a Caterpillar cake.  But knowing his love of cake, and chocolate, I thought I'd make him some Chocolate Brownie cupcakes for his birthday tea.

When I began googling a recipe I discovered Annie from the working mum's cookbook had done all the internet legwork for me.  So I took her recipe for Chocolate Brownie Cupcakes.  The only tweeks I made were to add 100g chopped walnuts to the mix instead of the chopped chocolate towards the end.  I did also find these were no longer moist in the middle after 20 minutes in the oven, and would lessen the cooking time next time.  Maybe even 10-15 minutes?
 
Makes about 10
100g dark chocolate (I used Bournville)
100g (slightly salted) butter
2 medium free range eggs
75g caster sugar
50g light brown muscovado sugar
120g plain flour
20g cocoa
1 teasp baking powder
A few drops of vanilla essence
100g chocolate – a mixture of white and milk chocolate – to make chocolate chips
  1. Melt butter and dark chocolate together in a metal bowl over a pan of boiling water, making sure the water doesn’t touch the bottom of the bowl. When melted let it cool for a few minutes. Pour into a mixing bowl.
  2. Break the eggs into a bowl with both the sugars and whisk until the mixture has gone significantly paler in colour, is frothy and a little thickened – one of the other recipes suggested this may take 3 – 8 minutes. If you have a mixer or food processor with a whisk attachment and can leave them beating whilst you get on with other things, that’s ideal.
  3. Measure out the flour, cocoa and baking powder and place in a sieve.
  4. Pour the egg/sugar mixture into the mixing bowl with the chocolate mixture. There should be quite a lot of air in the egg mixture which you don’t really want to lose, so fold the mixtures gently into each other.
  5. Put the dry ingredients into a sieve and sift about a third into the bowl until there is an even layer over the top of the chocolate mixture. Fold this in gently. Repeat sifting and folding until all the ingredients are mixed in evenly.
  6. Chop the white and milk chocolate into small chips using a sharp knife and add ⅔rds to the brownie mixture, saving the remainder for later.
  7. Line a cupcake tin with cases and fill each about ⅔rds full.
  8. Bake the cupcakes at 180°C for 20 minutes. About half way through open the oven door and scatter the remaining chocolate chips over the top of the cakes before returning to the oven to finish cooking.
  9. Take them out at 20 minutes when they should have a shiny cracked crust and not wobble when you shake the tray gently. If they do put them back for another couple of minutes cooking. You can’t test whether they are done or not as you do with cakes with a cocktail stick inserted into cake coming out clean – the brownie mixture will stick to it.
  10. Transfer them to a wire rack to cool straight away – gently as they’re still a little fragile. This will ensure that they keep the goo-ey centre. Alternatively if you prefer the more cake-like variety, leave them in the cupcake tin for 10 minutes or so before transferring out to cool.
  11. Eat them when warm with ice-cream, or they are possibly even nicer the following day when they’ve cooled.
Recipe by Annie at 'a working mum's cookbook'

Tuesday, 16 April 2013

Homemade Pain au Chocolat or Chocolate Croissant

It was Dad's birthday the first week of the Easter school holidays, but guiltily I was too busy baking for the Market to make him a cake.  So I decided the second best thing would be some homemade pain au chocolat.

Having watched Paul Hollywood make puff pastry earlier in the week I worried that shop bought puff pastry might not sweet enough.  But I need not have worried.  I am really pleased with the result, and more importantly so were the kids and Dad who had a few candles shoved in his.  Even with dark chocolate, the taste was pleasingly sweet.  And they crumbled and melted in the mouth in a most satisfying way.

This is so easy I would certainly get the kids to help next time.  The trickiest bit is deciding whether you like your chocolate dotted around your croissant or in a rich oozy core.  This dilemma is generally beyond children.

Homemade Pain au Chocolat

Makes 6 

1 pack ready rolled puff pastry
1 pack/100g dark chocolate buttons or roughly chopped dark cooking chocolate
50g butter

Gently melt the butter in a microwave or on the cooker.  Unroll the pastry and brush the melted butter all over the top.  Either scatter the chocolate over the pastry or make as thin a line as possible 1cm in from the front edge running left to right if you want a central 'core' of chocolate.  Roll the pastry and chocolate up fairly firmly, starting with the edge nearest you if you've gone for a chocolate core. Cut the rolled pastry into 6 equally sized pieces and place on a baking tray lined with baking parchment.

At this stage you could freeze them if you are making a large batch.  Otherwise bake for 15-20 minutes at 200C. Do watch carefully though as they seem to go from pale to brown all of a sudden near the end of the cooking time.  These also cook from frozen in about 20 minutes at the same temperature.

Allow to cool for a few minutes as the molten chocolate can quite painful on the roof of your mouth, and then blink and they're gone.

Wednesday, 3 April 2013

Riverford's Sticky Toffee Pudding

I've made several different steamed puddings over the last few months to sell at Alresford's Country Market, but this recipe from Riverford was by far the most successful.  Using only one egg to the other recipes' three, this recipe made a larger pudding that rose and held it's shape far better.  The only tweak I did was to use dates instead of apricots as I am selling to ageing traditionalists!

I made mine in four 300ml plastic pudding basins with lids, covering the pots with old butter wrappers.  From cold, these small puddings take 2 minutes on full power in a microwave to reheat to piping hot.

Riverford's Sticky Toffee Pudding

Serves 6-8

For the pudding:
175g dried apricots, very finely chopped
1 tsp bicarbonate of soda
300ml boiling water
50g butter
100g caster sugar
50g vanilla sugar
1 egg, beaten
225g flour
1 tsp baking powder

For the topping:
215g dark muscovado sugar
115g butter
6 tbsp double cream

Place the topping ingredients in a small pan and stir over a gentle heat until the butter has melted and sugar dissolved. Bring to the boil and simmer for 3 mins. Pour into two buttered 900ml pudding basins. Place the apricots in a bowl with the bicarb of soda and pour boiling water over them. Leave to cool thoroughly.

Cream the butter in a bowl with the caster and vanilla sugars until light and fluffy. Beat in the egg. Sift the flour with the baking powder and fold in. Stir the apricot mix into the batter and divide between two pudding basins.

Cover each basin with foil and secure tightly with string, leaving long ends. Knot these to make a handle across the basin so that it can easily be lifted out of the steamer. Place the bowls on trivets in a large pan and surround with enough hot water to come halfway up.

Cover and steam for 11⁄2 hours. Check every 20 mins or so that the pan has not boiled dry and keep topping up with boiling water. Lift out of the water and turn the puddings out onto a warmed serving dish.

Tuesday, 26 February 2013

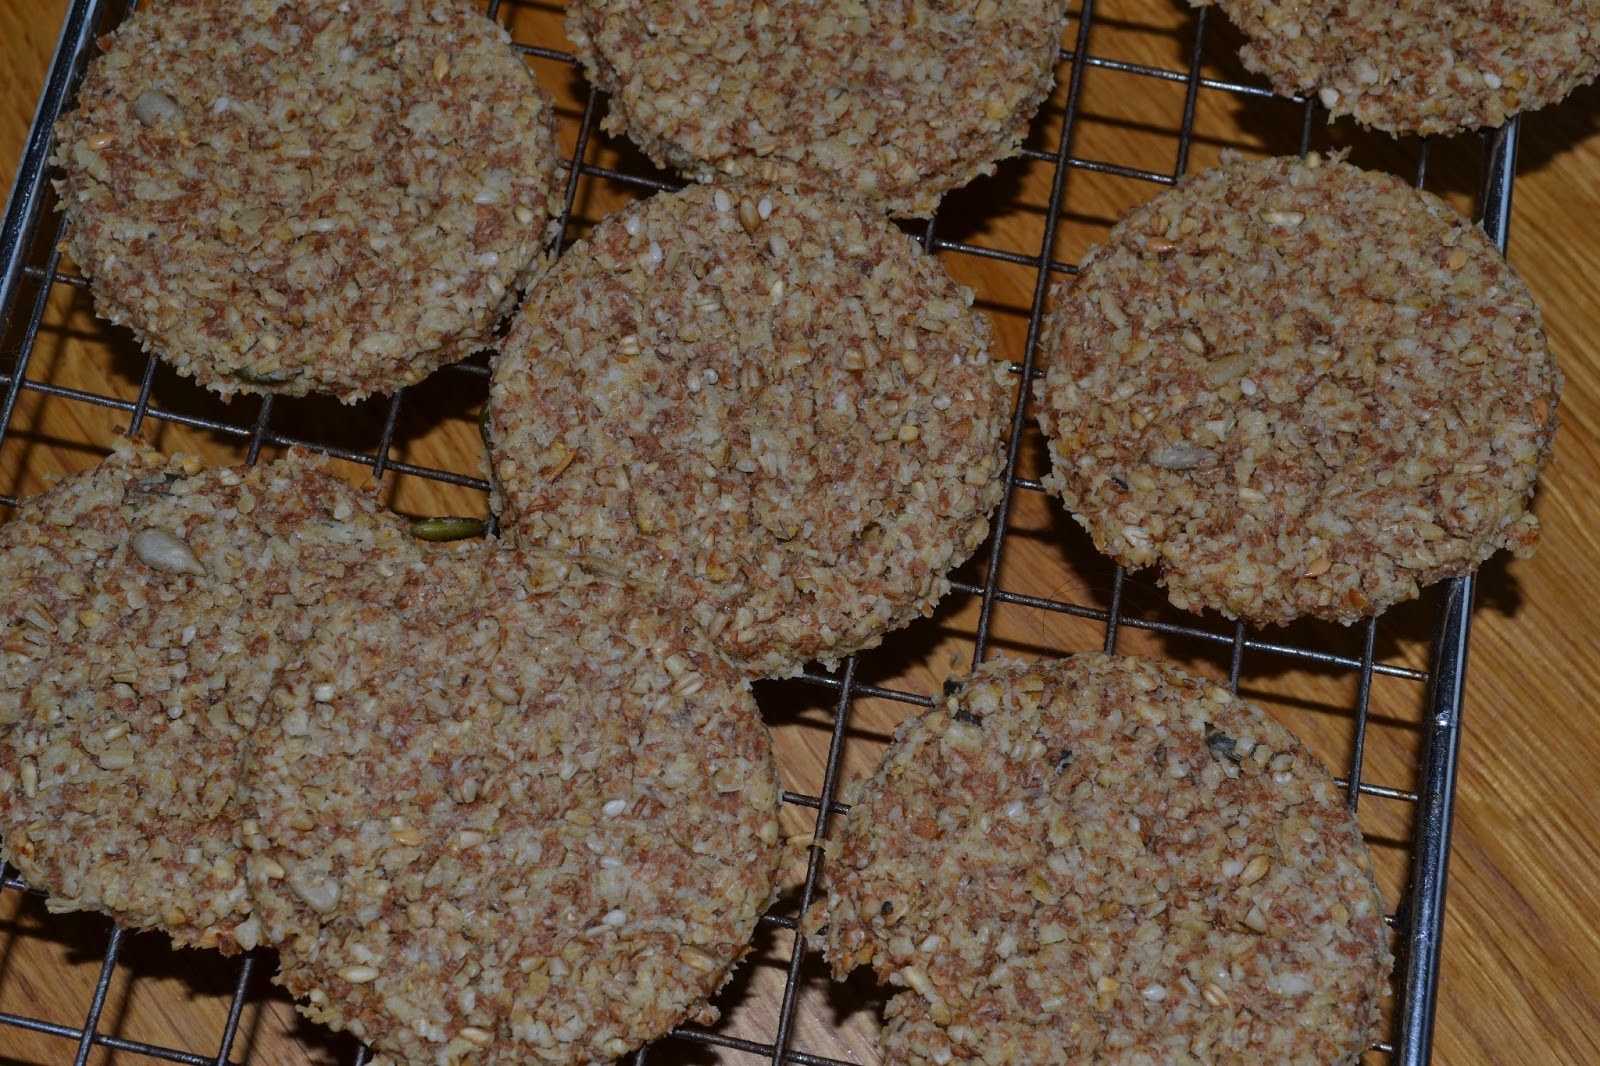
Moreish Oatcakes

My sister in law last week was singing the praises of oatcakes, amongst other things, in her losing 1 stone.  So this morning the homemaker in me decided to give them ago with a pack of oatmeal that has been sitting in the back of my cupboard for over a year for this very purpose.

Making your own oatcakes turns out to be childs play, and I might even deploy my children next time I make some.  But this version is sadly not as calorie light as I had hoped coming in at over 100 cals per oatcake. But they feel like they are doing you good!

150g porridge oats
150g medium oatmeal
1 tbsp mixed seeds
75ml sunflower oil
150ml just boiled water
1/2 tsp salt

Simply mix and squish all the ingredients together.  Leave to stand for a couple of minutes whilst you turn the oven on to 180C, find a rolling pin, find a baking tray, line it with greaseproof paper, and find a suitable round cookie cutter (I used a small plastic jelly mould which had a useful hole in the top for poking out reluctant oatcakes).

Roll out the dough to about 5mm on another piece of greaseproof paper and cut out your cakes.  Cut close together so you have to rework the dough as little as possible as it will start to get too crumbly.  I made about 17.

Bake the oatcakes for 20 minutes, turning them over half way through.

Monday, 18 February 2013

My First Steamed Treacle Pudding

Lavender & Lovage's and What Kate Baked's February's Tea Time Treats challenge is puddings, which tied in well with my intention to experiment with steamed sweet puddings with a view to selling them at the Country Market.  This was not strictly my first pudding but first I managed to remember to photograph before the kids ate it.

My first was a jam steamed pudding.  Cooked a little too gently in the slow cooker, it flopped and spread onto the plate.  Although the jam did crown it beautifully even if I say so myself.  And the kids wolfed it down.

My second was a Steamed Treacle Sponge Pudding a la Delia.  Steamed on the stove, it did sit very pertly on the plate when turned out.  Sadly I only made one and the three children having tea (two of my own and one guest) wolfed it all down again making very reassuring noises.

So the recipe below is a repeat performance of the above pudding. It filled three small (3/4 pint/450ml) plastic pudding basins which I crammed three into a domed roasting tray balanced on a trivet.  I had feared I had steamed them too vigourously judging by the bulging foil cooking lids.  But the resulting puds still was surprisingly 'creamy' inside - maybe because I'm lazy and didn't bother to sift the flour and used the food processor blade to mix everything.  Next time I'll try sifting, whisking, and steaming in baking tray in the oven to see if I can make the pert little sponge puddings Delia achieves!

Steamed Treacle Pudding
1 tablespoon black treacle
3 tablespoons golden syrup
6 oz (175 g) self-raising flour
1 rounded teaspoon baking powder
6 oz (175 g) butter, softened
3 large eggs
6 oz (175 g) soft light brown sugar

To serve:
3 extra tablespoons golden syrup
custard or crème fraîche

First generously butter your pudding basin.  Delia recommends a 2 pint/1.2l basin.  I used 3 3/4 pint/450ml plastic Christmas pudding basins so I could microwave them later to heat the pudding, plus I find them easier to turn the pudding out with just a little squeeze.  Put the golden syrup at the bottom of the buttered basin or divide it between how ever many basins you are using.


Sift the flour and baking powder into a large mixing bowl. Add the softened butter, eggs, sugar and black treacle.  Beat the mixture with an electric hand whisk  for about 2 minutes until it's thoroughly blended. Spoon the mixture into the basin/s and level the top using the back of the spoon.

Cut a piece of greaseproof paper and foil into a square large enough to fit your pudding basin/s.  Place the cut foil over the greaseproof paper, make a pleat in the centre, and place this, foil-side uppermost, on top of the pudding. Pull it tightly round the top and tie the string firmly just below the lip of the basin.  Trim off the excess paper all the way round.  Don't be tempted to use the plastic lid instead if you have one.  I tried this and the puddingy goodness oozed out.  So yet again, trust Delia's experience on this and make a 'proper' greaseproof paper and foil lid!

Stand the basins on a trivet or plate in a large pan.  Pour boiling water have way up the sides and cover with a well fitting lid or make a tented lid with more foil well crimped around the edges of the pan.  Steam for 2 hours, checking the water level halfway through.

To serve, loosen the pudding all round using a palette knife or gently squeeze the plastic basin.  Delia suggests pouring over extra golden syrup and serving with custard or some well chilled crème fraîche.  I found these quite sweet enough without.

Twitter: Leesa@sunhillcurry
Instagram: sunhillmakesbakes

Tuesday, 12 February 2013

Jamie's Perfect Pancakes

A well timed tweet from @jamieoliver for today, Shrove Tuesday.  Served with golden syrup, nutella, & strawberry jam.

Perfect pancakes: 1 egg, 1 cup self-raising, 1 cup milk, pinch of salt. Whisk. Pour into a hot frying pan. Flip! RT&Share

No photo as the battery died just as I tried to take a photo of Dad flipping!